How To Seal My Asphalt Driveway DIY
As summers are approaching, now is your chance to complete any outdoor maintenance tasks before spring ends. One way to get ahead is by sealing your asphalt driveway. While some homeowners choose a professional to do this job, others are completely capable of making this a weekend DIY project.
If you’re like most homeowners, you’ve probably spent a good amount of money building your driveway to enhance your curb appeal. However, with the sun beating down in summers, harsh cold temperatures in winters, as well as exposure to oil and grease from vehicles – it can all leave your driveway looking old and rundown. Here we’ve compiled a step-by-step guide for outdoor enthusiasts that will show you how to refresh your asphalt, improve the curb appeal of your home, and put a protective layer on your asphalt in just one weekend.
With these easy-to-follow instructions, you’ll be ready to seal your driveway in no time!
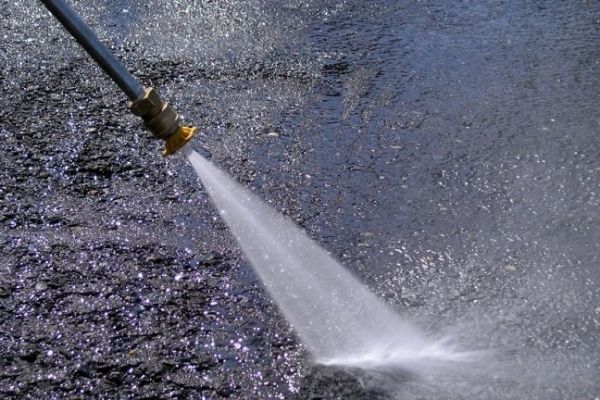
1. Clean the Driveway
While your driveway may appear clean at first glance, in reality, that’s hardly ever the case. Gas combustion from your car deposits a thin film of grease and oil on the surface that causes dirt to accumulate on your driveway. This layer of gunk prevents the sealer from effectively sticking to the surface, so it must be removed first.
After you’ve swept or blown off all the debris from the driveway, use a driveway cleaner and degreaser with a power washer or garden hose to get rid of the top oily layer. Once done, scrub and sweep the driveway again with a push broom to brush away any excess dirt and debris.
Also, don’t forget to trim the grass growing on the edge of your driveway for a neater final look.
2. Prime Oil & Grease Stains
The asphalt degreaser will take care of minor spots and stains. However, you need a more heavy-duty product for more stubborn stains, such as those left from oil and gas. Apply an oil spot primer to these hard-to-treat spots and work it in with a stiff bristle brush. Instead of removing the stain, a primer works by coating it to block it completely. Apply a single coat for small stains and a second coat for tougher ones.
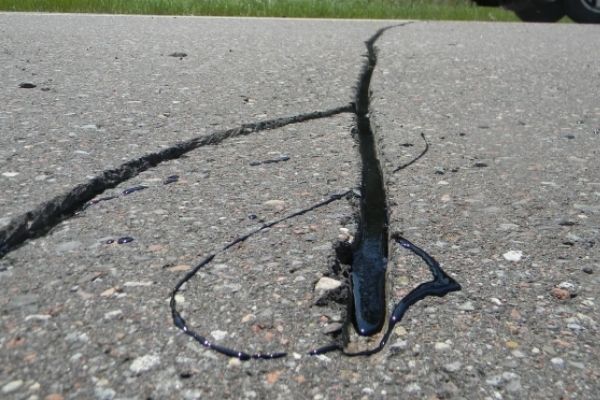
3. Fix and Patch Cracks
If you want to have an even and smooth-looking driveway, you can’t overlook the importance of patching holes and cracks before pouring the sealant. Holes smaller than half an inch are relatively easy to fix with a little bit of crack filler easily available at most hardware stores across the U.S. Just fill the cracks with the liquid and allow it to settle for up to eight hours before covering it with the sealant.
Bigger holes and cracks, however, require more than just crack filler to fill the empty space effectively. For these, you need to install a driveway patch. Let the driveway patch cure for 5 to 6 weeks before sealing it for best results.
4. Seal the Boundaries
Before you start sealing the driveway, you ought to first prepare your sealant. Using a drill with a paddle, begin stirring the mixture at the top, slowly moving towards the bottom of the container. When the mixture becomes smooth and homogenous, it’s ready for application. Start by drawing clear boundaries around your driveway; use a brush to paint a thick coat along all four sides.
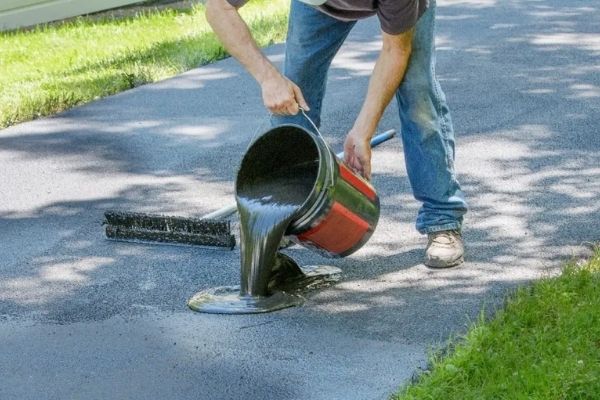
5. Pour the Sealant
Now that you have cut the edges, start pouring the sealing mixture onto the driveway. Carefully read through the manufacturer’s instructions on how to apply the material to your driveway. However, most sealants are generally poured directly from the pail over the asphalt. Move in an east to west or north to south direction as you continue to spew the mixture out of the container.
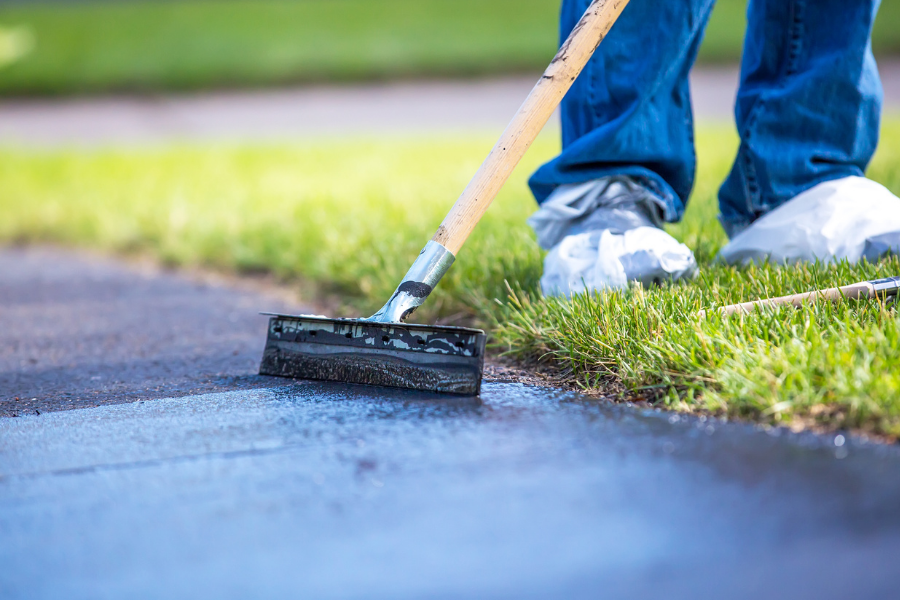
6. Spread It Out
As the sealer will be in thick puddles, you must spread out the mixture using a squeegee. However, not all sealants are created equal. Some are thicker than others and need to be spread out using a stiff brush.
If you are applying two coats (which might be necessary depending on the product you’ve chosen), wait 24 hours before repeating the process again to create a tough coating for your asphalt driveway.

7. Let It Dry (Seriously, Let It Dry!!)
Most sealers take anywhere from 12 to 48 hours to cure and completely dry out. That means you can’t use your driveway for walking or parking your vehicles until the mixture has settled down. To check whether it’s ready for use, use a dry cloth or towel to touch the asphalt surface. If it comes out black, you need to wait some more before you can start using your driveway again. This is not a step to be skipped! It can be where most homeowners make a mistake and wreck their beautiful handiwork. Drying times can vary greatly based on product type, temperature, and humidity. When in doubt, wait another 24 hours.
Sealing Your Asphalt Driveway Has Never Been Easier!
Who says you have to pay professionals to maintain your driveway when you can do it on your own, from start to finish, by following a few simple steps?
Besides making your driveway appear newer, sealing asphalt also prevents further damage from the UV rays of the sun, extreme weather conditions, and harmful chemicals. Seal your asphalt driveway as often as every year or every other year to extend the lifespan and preserve it against damage.